Documentation Menu

About Dreamsrent

This documentation will provide you all the details you need to use the Dreamsrent theme and understanding of how Dreamsrent is structured and guide you in performing the most common features. If you require further assistance, related to topics not covered in this documentation, then please contact us via our support forum.

We assume that you already have WordPress installed and ready to go. If you do not, please see our section on WordPress to help you get started.

screenshot Doccure

WordPress Instructions

To use this theme you need a working version of WordPress already installed on your server or the local environment. We have given the documentation links, where you will find the requirements and the other details about WordPress.

Theme Requirements

To use the Dreamsrent theme you need the latest version of WordPress, PHP Version 7 or higher, and MySQL 5 or higher. Apart from the necessary WordPress requirements here are listed recommended server configuration requirements to make the theme work properly.

  • PHP – Version 7.2 or higher
  • MySQL – Version 5.6 or higher ( OR MariaDB version 10.1 or higher)
  • memory_limit – 512M or higher
  • max_execution_time – 300 or higher
  • upload_max_filesize – 256M or higher
If you are not sure about the server requirements here is the quick guide on how you can easily change the server requirements. Changing server requirements. We still prefer contact your server provider for this.

What’s Included

In the product files we providing the theme files, required plugins for the theme.

Getting Support

Support is limited to questions regarding the theme’s features or problems with the theme. We are not able to provide support for code customizations or third-party plugins. If you need help with anything other than minor customizations of your theme then you should enlist the help of a developer.

Theme Installation

We assume that WordPress website is set, Now the next step is to install the theme. To get started with theme installation you’ll need to download the theme file. To download the theme file, go to Envato Themeforest downloads and locate the theme.

There are three ways to install the theme in you wordpress environment you can use any of them to install theme.

  • FTP Client – You can use the FTP Client for this.
  • Through WordPress – You can install it directly using WordPress theme installation.

FTP Installation

Follow the steps below to install via FTP.

Step 1 – Log into your web server with FTP client software

Step 2 – Unzip the Dreamsrent.zip file and ONLY use the extracted Dreamsrent theme folder

Step 3 – Upload the extracted theme folder into wp-content > themes folder

Step 4 – To Activate the newly installed theme. Go to Appearance > Themes and activate it.

WordPress Installation

Follow the steps below to install via WordPress.

Step 1 – Navigate to Appearance > Themes.

Step 2 – Click Install Themes and hit the upload button.

Step 3 – Navigate to find the “Dreamsrent.zip” file on your system and click “Install Now”

Step 4 – Activate the newly installed theme. Go to Appearance > Themes and activate it.

Demo Content

Before you start importing the demo content make sure you have installed all the required plugins for the theme so that demo content import properly. Here is the plugin list that you need to install and active before you start import. You will find them in ( Appearance > Install Plugins )

Note: Install & Activate plugins one by one and please refer right side image for your reference

  • Advanced Category and Custom Taxonomy Image
  • Woocommerce
  • Recent posts widget
  • Metabox
  • Elementor
  • One click demo import
  • Taxonomy Images
  • DreamsRent Core
  • DreamsRent Elementor
  • Redux Framework

Now for the demo import, you have to go to the ( Appearance > Import Demo Data ). Now click on the Import Demo Data and then click on Import Demo button and wait for some time your demo will be ready in a few minutes.

You’ve setup your theme and ready to go

DR Home Banner

Add/Edit DR Home Banner

Dreamsrent Theme Options

Dreamsrent Options is the Theme Options that powers Header, Footer & Page functionalities. You’ll find all the settings in Appearance -> Theme Options

Header Setting

This Field is responsible for changing Logo, Mobile Logo, Login Page, Register Page & Forget Password Page

Pages Settings

This Field is responsible for assigning pages Dashboard Page, Bookings Page, Reviews Page, Wishlist Page, Chat Page, Payments Page & Profile Page

Product Settings

In product settings, you can easily find out how to add new product and its categories.

Locations

This Field is responsible for changing or adding new location to vehicle. Car Rental -> Locations

Add Location name and slug as same and Click Save button

Vehicle IDs

This Field is responsible for assigning the vehicle ID for every vehicle. Car Rental -> Vehicle IDs

Add Vehicle IDs name and slug as same and Click Save button

Car Category

This Field is responsible for assigning the Car Category which is used in adding new or existing products. Car Rental -> Car Category

Add Car Category name and slug as same and Click Save button

Car Type

This Field is responsible for assigning the Car Type which is used in adding new or existing products. Car Rental -> Car Type

Add Car Type name and slug as same and Click Save button

Car Capacity

This Field is responsible for assigning the Car Capacity which is used in adding new or existing products. Car Rental -> Car Capacity

Add Car Capacity name and slug as same and Click Save button

Car Steering

This Field is responsible for assigning the Car Steerings which is used in adding new or existing products. Car Rental -> Car Steering

Add Car Steering name and slug as same and Click Save button

Adding Vehicle

We can add new vehicle for booking by clicking Add New under the Products section in admin dashboard.

Woocommerce Payments

Appointment booking process have the following steps

Create a dummy product

Chose "Booking" in product data that will be used to make the payment for the appointment.

  • Paypal Payment – general information Paypal Payment
  • Stripe Payment – general information Stripe Payment
  • Razorpay Payment – general information razorpay Payment
  • Source & Credits

    Envato Market Plugin Installation

    This will download the zip file with the plugin in it. No need to unzip it – we’ll be installing it as is. Now that you have the plugin, go ahead and log into your WordPress installation that you want to add auto-updates to.

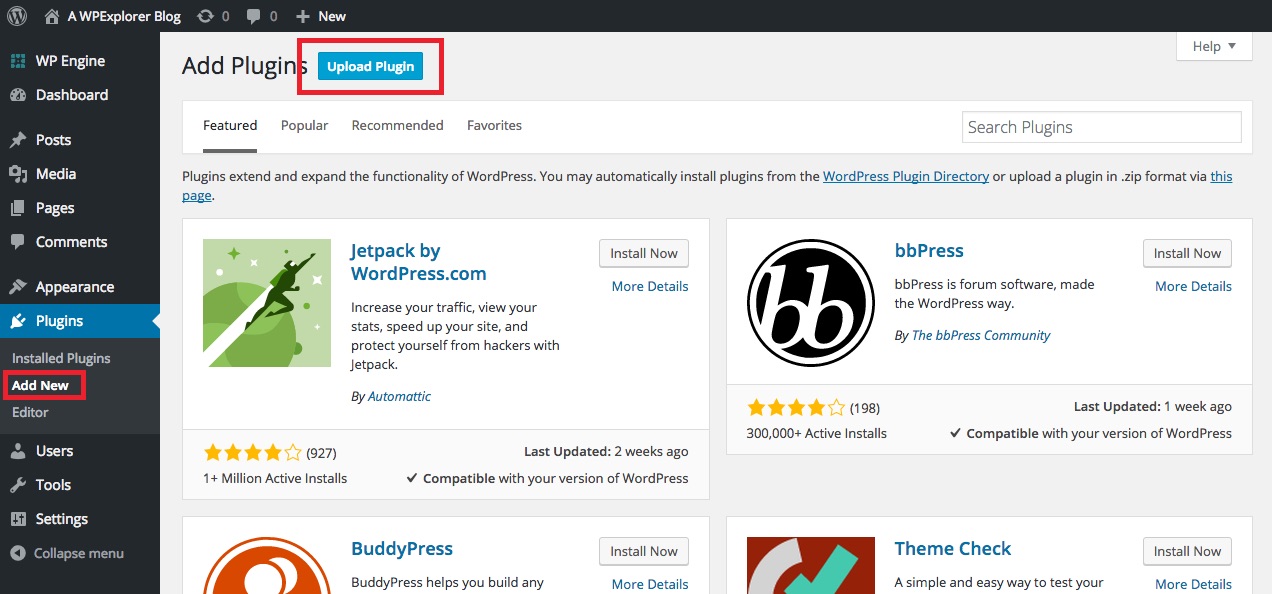
    To install the plugin navigate to Plugins > Add New and click on the Upload Plugin button at the top of the page.

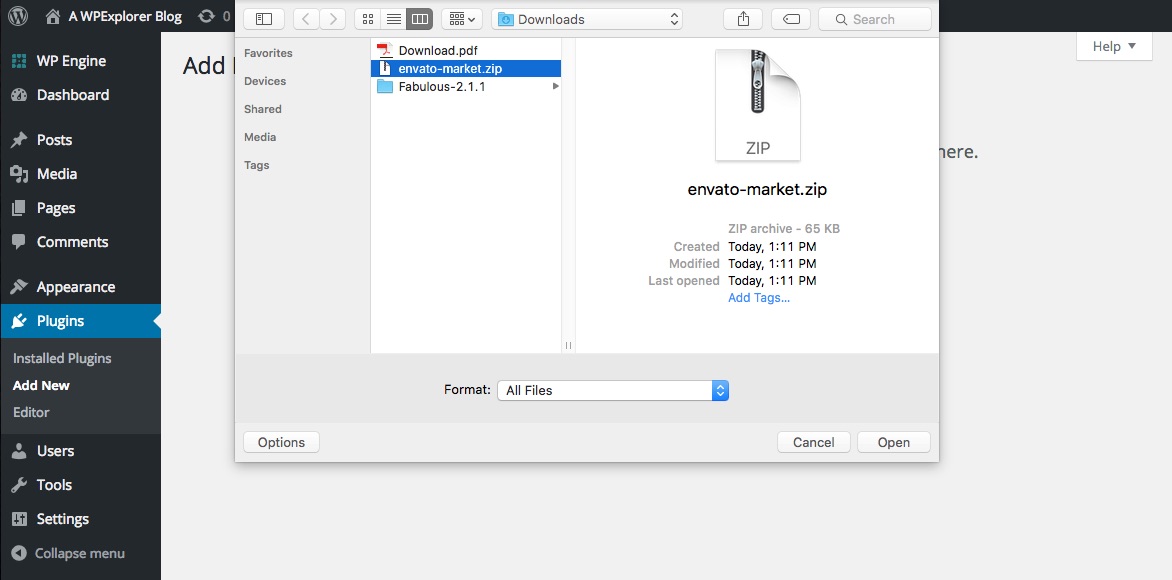
    Next browse for the envato-market.zip file that you downloaded from Github.

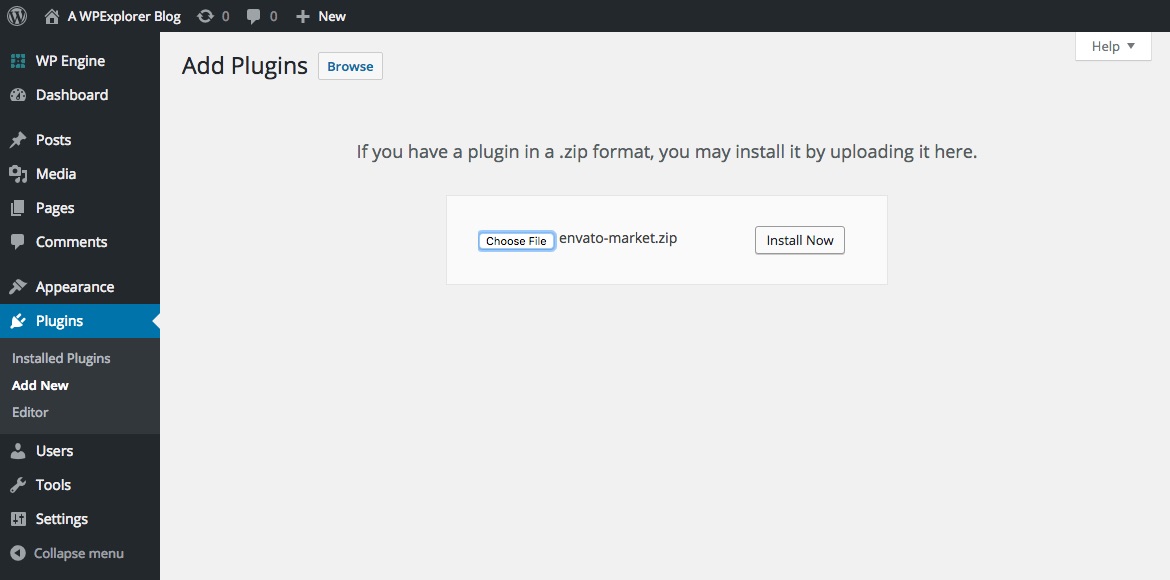
    Then click the button to Install Now and when prompted click the Activate Plugin link.

    Envato Market Plugin Setup

    The next step is to sync the Envato Market plugin with your Envato account to have access to all of your marketplace purchases as well as item updates.

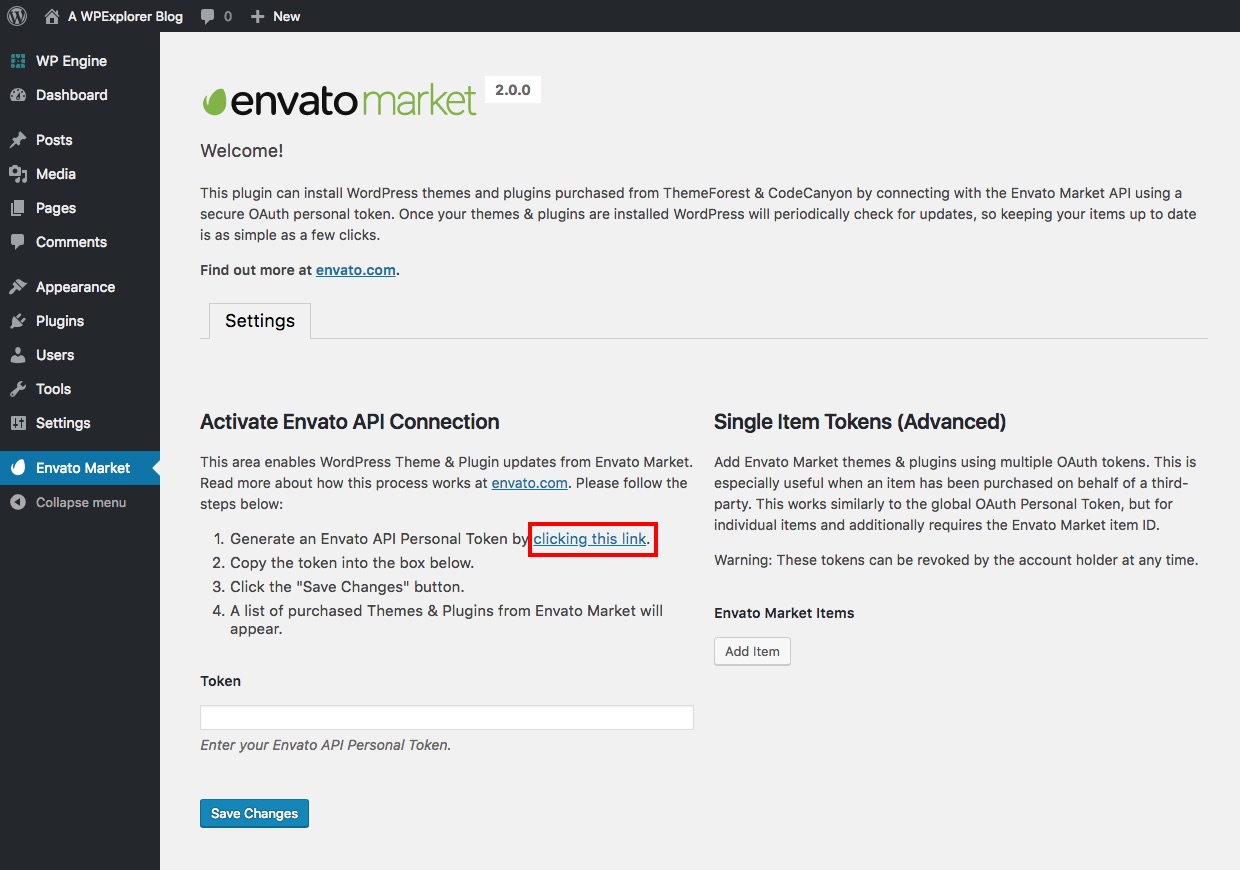
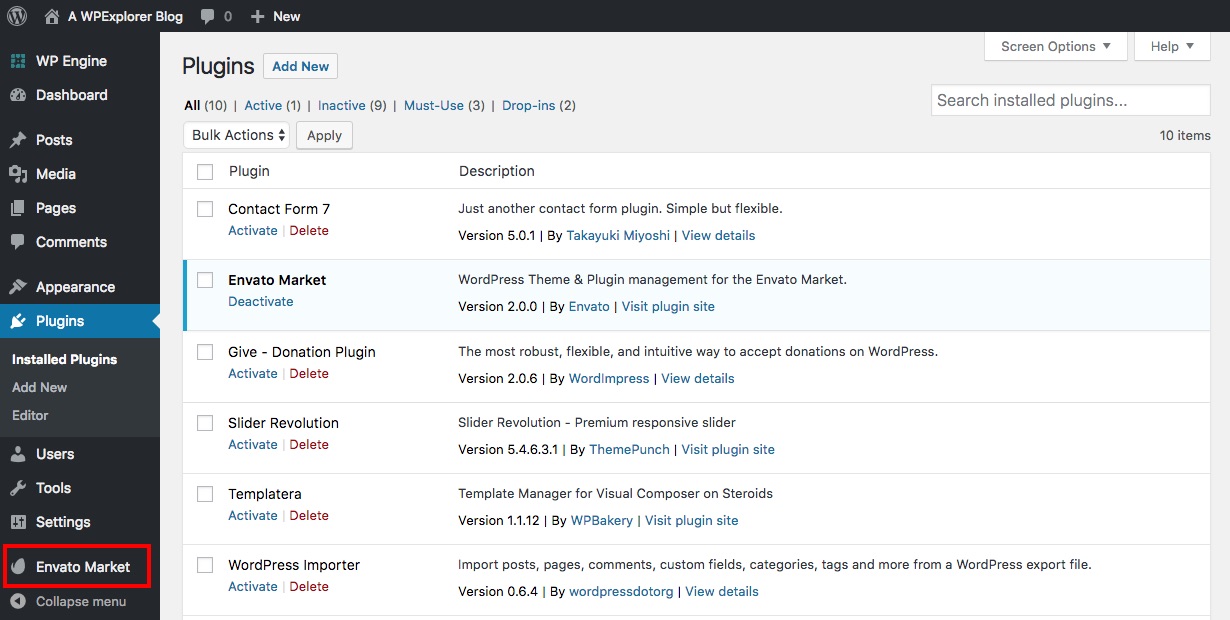
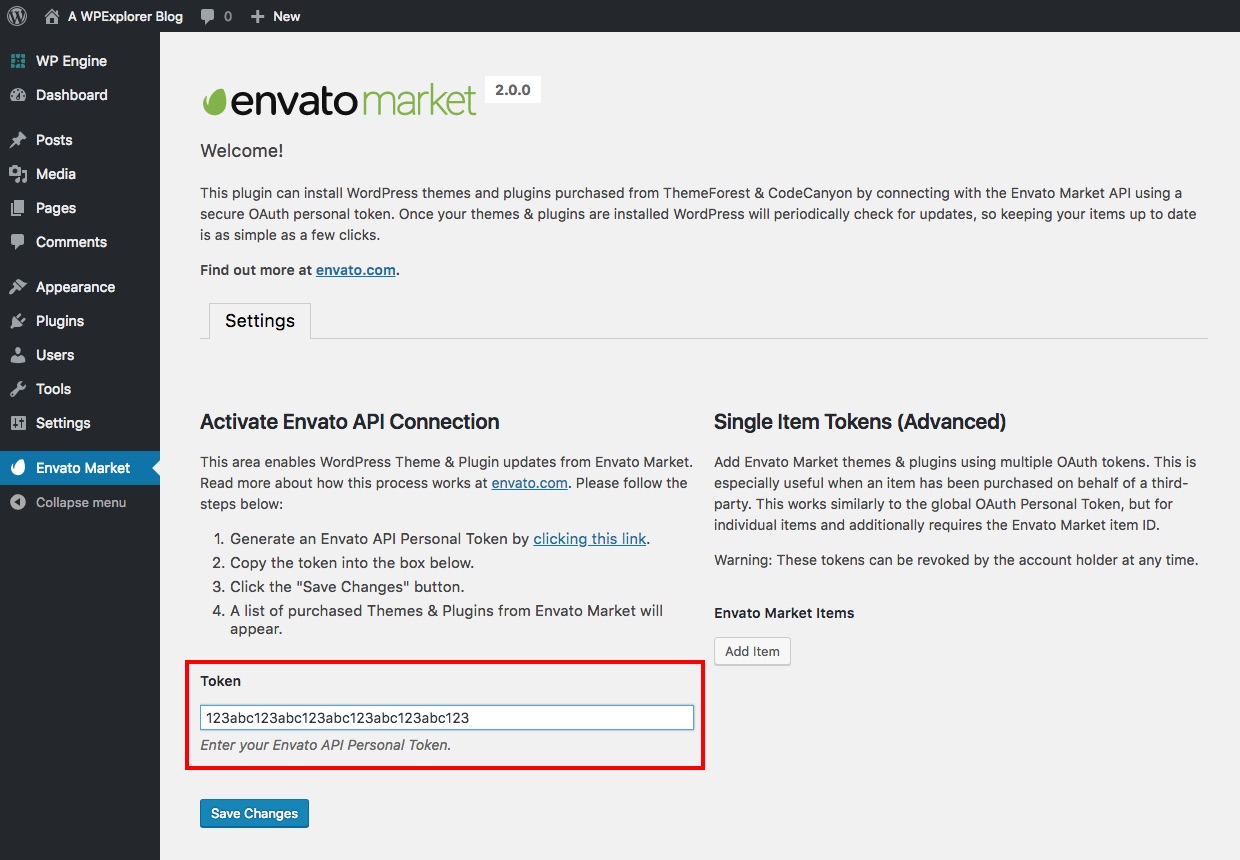
    To get started click on the Envato Market link in your dashboard menu. You should see a screen similar to the one above. The very first step is to create an Envato API token. To do this, click on the generate a personal token link (highlighted in red above).

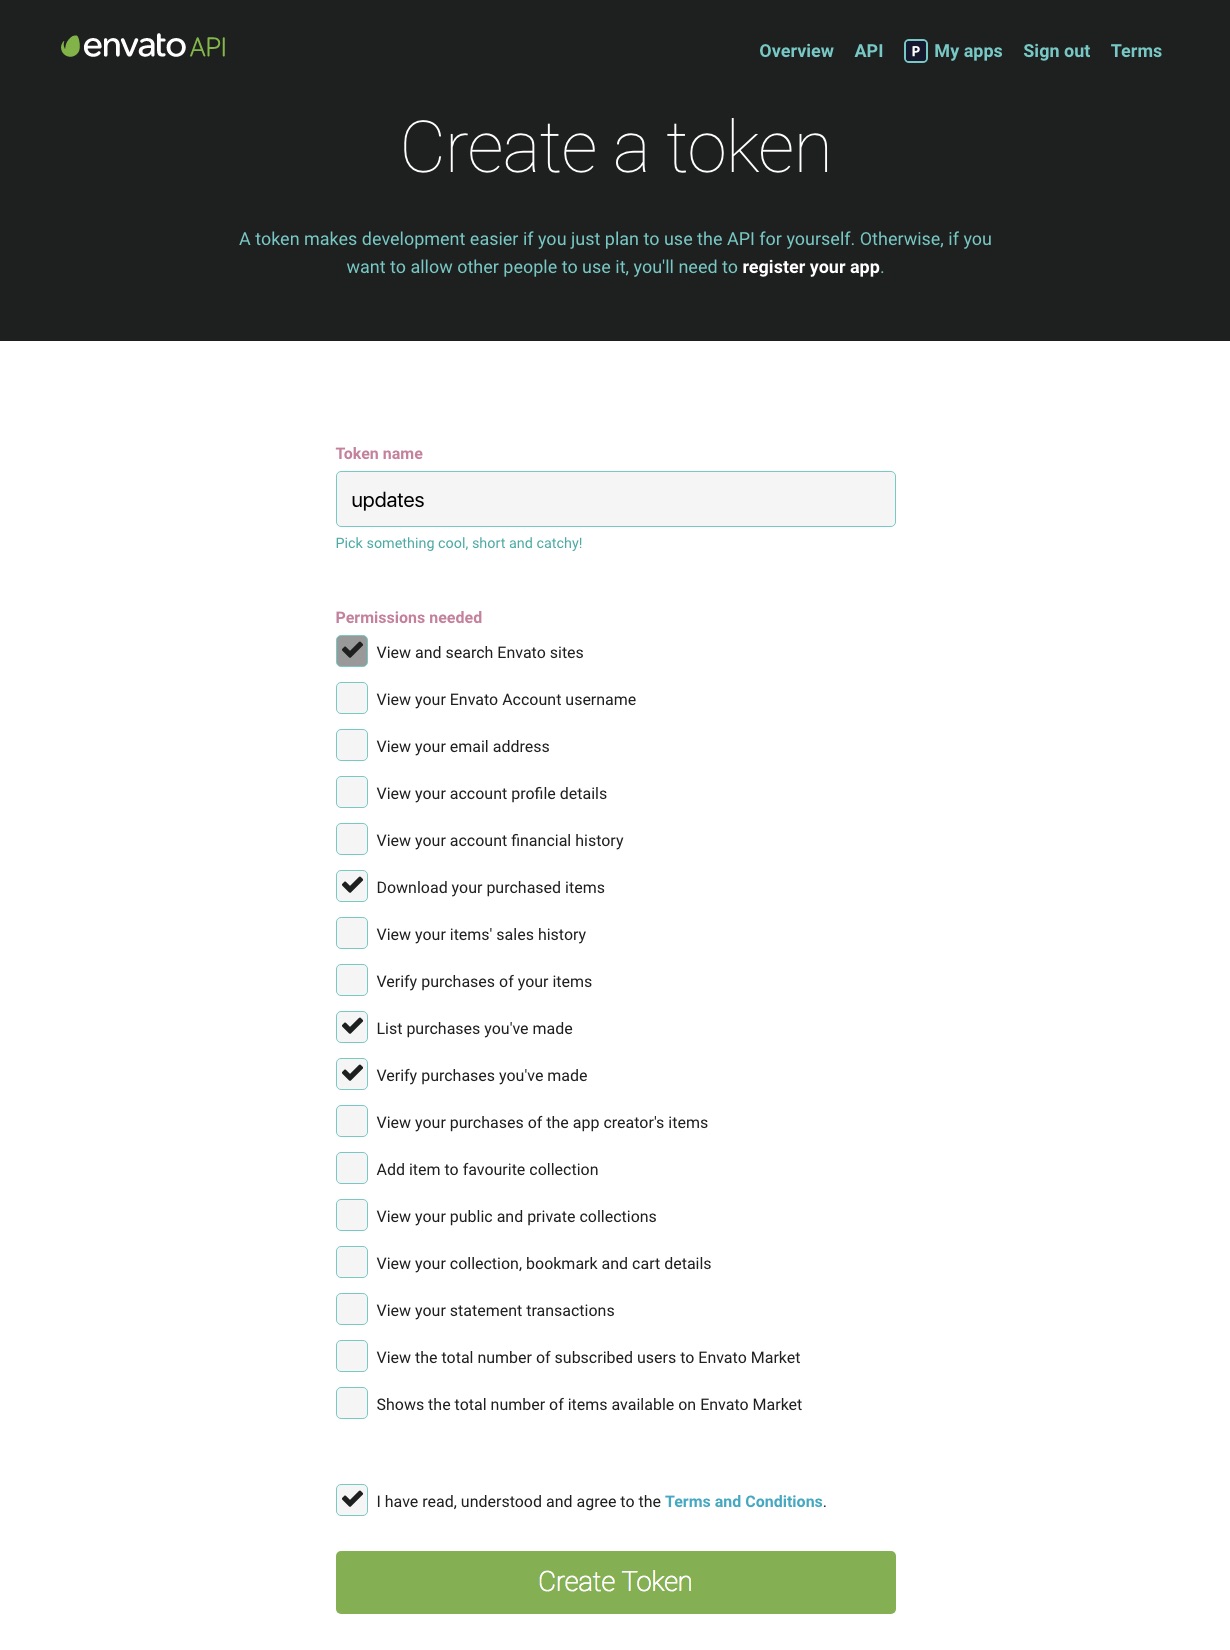
    If you’re already logged into your Envato account you’ll be taken to the screen above (otherwise you will be prompted to login first before being redirected to this page). On this screen you can see what the Envato Market plugin is requesting permission to access via your Envato account (Envato sites, the ability to download your items, a list of your purchases and verification of your purchases). To proceed give your token a name, check the box that you have read and agree to the terms and then click the green button to create your token.

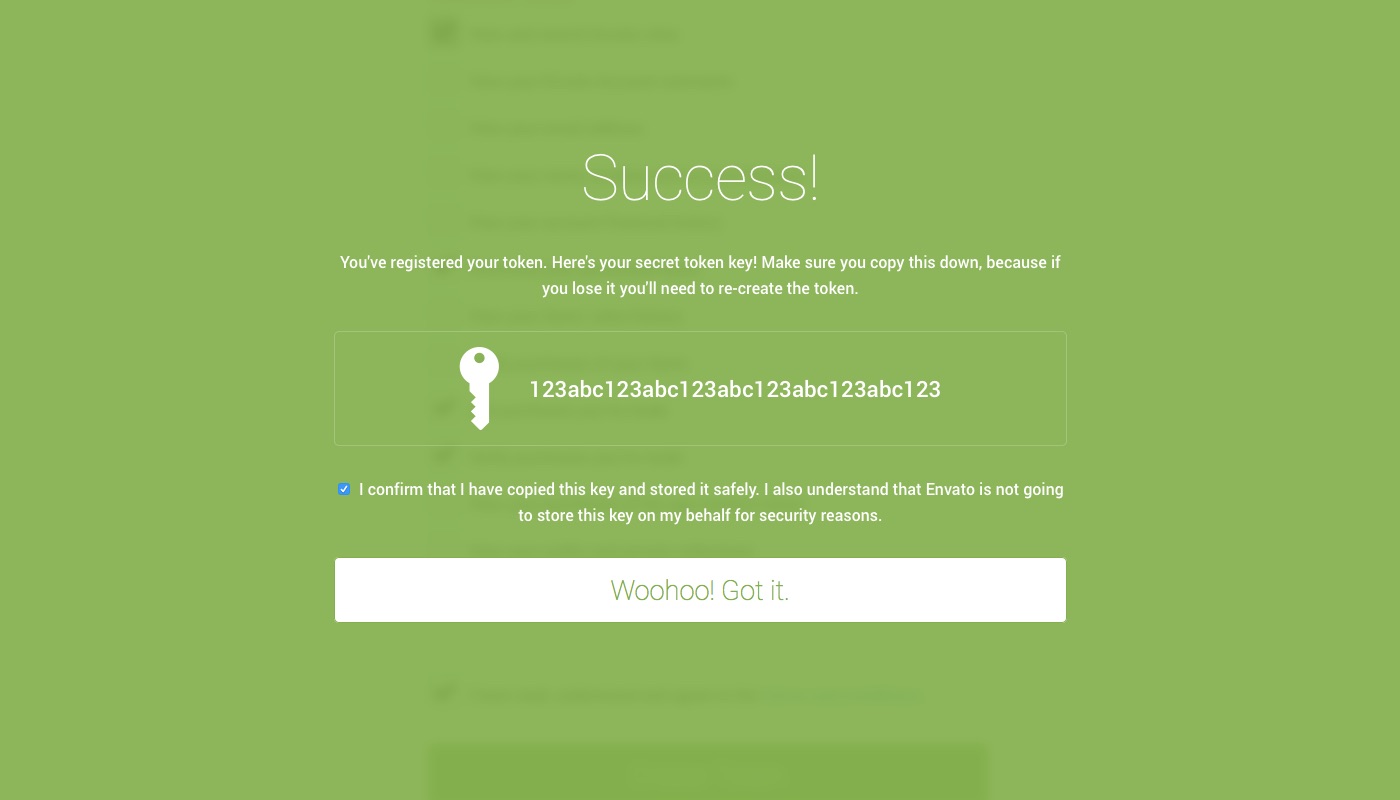
    Once your token is created you will see a green success screen. Copy your token code (this is very important since Envato doesn’t store a copy of the token for you), check to confirm that you’ve copied it and click the white button that you got it.

    Now go back to your WordPress installation and paste in your Envato API token then click save.

    It’s possible that you might see the error above when you first enter your token. Don’t worry, just go back to the previous page and try again. It should work on the second go.

    Please click here for more